
코딩 노트
jQuery06 - 이미지 슬라이더, 텍스트 에디터, 파일 업로드 본문
maven은 프로젝트를 세팅해놓으면 거기에 맞게 빌드업해주는 것
NPM도 마찬가지
<!DOCTYPE html>
<html lang="ko">
<head>
<meta charset="UTF-8">
<meta name="viewport" content="width=device-width, initial-scale=1.0">
<title>이미지 슬라이더</title>
<!-- 구글 웹 폰트를 사용을 위한 CDN -->
<!-- 아이콘 사용을 위한 Font Awesome 6 CDN -->
<link rel="stylesheet" type="text/css" href="https://cdnjs.cloudflare.com/ajax/libs/font-awesome/6.4.2/css/all.min.css">
<!-- 내가 만든 CSS 파일을 불러오는 코드 -->
<link rel="stylesheet" type="text/css" href="./css/reset.css">
<link rel="stylesheet" type="text/css" href="./css/commons.css">
<!-- <link rel="stylesheet" type="text/css" href="./css/test.css"> -->
<!-- jquery cdn -->
<!-- swiper cdn -->
<style>
:root {
--swiper-theme-color: #2c8de0
}
.swiper {
width: 100%;
height: 300px;
}
</style>
<!-- Javascript 작성 공간 -->
<script>
$(function(){
var swiper = new Swiper('.swiper', {
// Optional parameters
// direction: 'vertical', //슬라이드 방향
loop: true, //슬라이드의 순환 설정
// If we need pagination
pagination: {
el: '.swiper-pagination', //적용할 영역, 요소, 태그
type: 'bullets', //페이지네이션의 유형 (progressbar/bullets/fraction)
clickable:true, //페이지네이션 클릭가능여부
},
// Navigation arrows 이동 화살표
navigation: { //스와이퍼를 한 페이지에 여러 개 쓸 때 제대로된 타겟팅을 위한 지정
nextEl: '.swiper-button-next',
prevEl: '.swiper-button-prev',
hideOnClick: true, //클릭 시 숨김 처리 여부
},
// And if we need scrollbar 스크롤바
// scrollbar: {
// el: '.swiper-scrollbar',
// },
// 자동재생
autoplay: {
delay: 2000,//재생간격(ms)
pauseOnMouseEnter:true, //마우스 진입 시 멈춤 여부
},
//이펙트(페이지 전환 효과) 설정
effect: "slide", //(slide/fade/cube/coverflow/flip/creative/cards)
});
});
</script>
</head>
<body>
<div class="container w-600">
<div class="row">
<h1>이미지 슬라이더</h1>
</div>
<div class="row">
<!-- Slider main container -->
<div class="swiper">
<!-- Additional required wrapper -->
<div class="swiper-wrapper">
<!-- Slides -->
<div class="swiper-slide">
</div>
<div class="swiper-slide">
</div>
<div class="swiper-slide">
</div>
<div class="swiper-slide">
</div>
<div class="swiper-slide">
</div>
<div class="swiper-slide">
</div>
</div>
<!-- If we need pagination -->
<div class="swiper-pagination"></div>
<!-- If we need navigation buttons -->
<div class="swiper-button-prev"></div>
<div class="swiper-button-next"></div>
<!-- If we need scrollbar -->
<!-- <div class="swiper-scrollbar"></div> -->
</div>
</div>
</div>
</body>
</html>

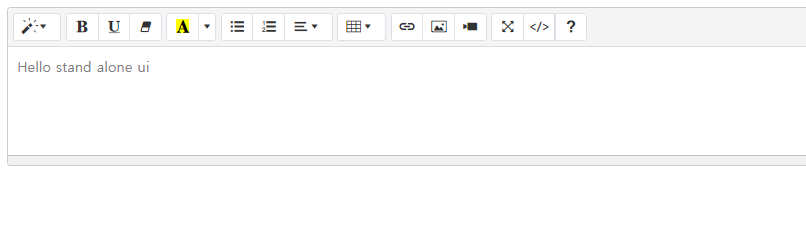
51.text-editor.html
<html lang="en">
<head>
<meta charset="UTF-8">
<title>without bootstrap</title>
<link href="https://cdn.jsdelivr.net/npm/summernote@0.8.18/dist/summernote-lite.min.css" rel="stylesheet">
</head>
<body>
<textarea id="summernote"></textarea>
<script>
$('#summernote').summernote({
placeholder: 'Hello stand alone ui',
tabsize: 2,
height: 120,
toolbar: [
['style', ['style']],
['font', ['bold', 'underline', 'clear']],
['color', ['color']],
['para', ['ul', 'ol', 'paragraph']],
['table', ['table']],
['insert', ['link', 'picture', 'video']],
['view', ['fullscreen', 'codeview', 'help']]
]
});
</script>
</body>
</html>
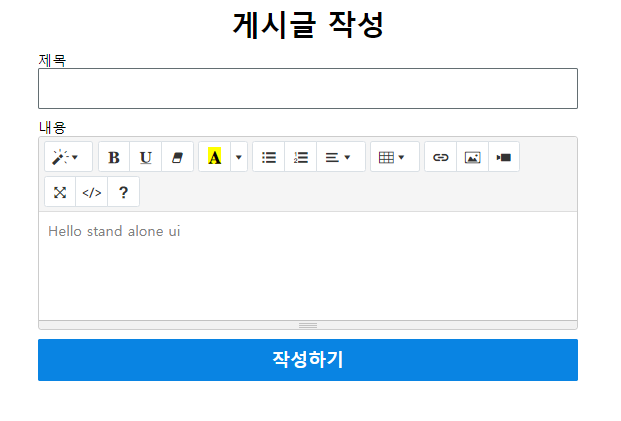
52.text-editor.html
<!DOCTYPE html>
<html lang="ko">
<head>
<meta charset="UTF-8">
<meta name="viewport" content="width=device-width, initial-scale=1.0">
<title>Rich Text Editor</title>
<!-- css 파일을 불러오는 코드 -->
<!-- 아이콘 사용을 위한 Font Awesome 6 CDN -->
<link rel="stylesheet" type="text/css"
<!-- 구글 웹 폰트 사용을 위한 CDN -->
<!-- 내가 만든 CSS 파일-->
<link rel="stylesheet" type="text/css" href="./css/reset.css">
<link rel="stylesheet" type="text/css" href="./css/commons.css">
<!-- <link rel="stylesheet" type="text/css" href="./css/test.css"> -->
<style>
</style>
<!-- jquery cdn -->
<!-- summernote cdn -->
<link href="https://cdn.jsdelivr.net/npm/summernote@0.8.18/dist/summernote-lite.min.css" rel="stylesheet">
<!-- javascript 작성 공간 -->
<script>
$(function () {
$('[name=boardContent]').summernote({
placeholder: 'Hello stand alone ui',
tabsize: 2,
height: 120,
toolbar: [
['style', ['style']],
['font', ['bold', 'underline', 'clear']],
['color', ['color']],
['para', ['ul', 'ol', 'paragraph']],
['table', ['table']],
['insert', ['link', 'picture', 'video']],
['view', ['fullscreen', 'codeview', 'help']]
]
});
});
</script>
</head>
<body>
<form method="post">
<div class="container w-600">
<div class="row">
<h1>게시글 작성</h1>
</div>
<div class="row left">
<label>제목</label>
<input type="text" name="boardTitle" class="form-input w-100">
</div>
<div class="row left">
<label>내용</label>
<textarea name="boardContent" class="form-input w-100" rows="10"></textarea>
</div>
<div class="row">
<button type="submit" class="btn btn-positive w-100">작성하기</button>
</div>
</div>
</form>
</body>
</html>
텍스트 에디터를 쓸 때 이미지를 직접적으로 넣는 행동은 하지 않는 것이 좋다. (용량을 엄청 많이 차지함)
52.text-editor.html 수정
<script>
$(function () {
$('[name=boardContent]').summernote({
placeholder: '내용을 작성하세요.',
tabsize: 2, //탭을 누르면 이동할 간격
height: 120, //에디터 높이
minHeight: 200, //에디터 최소 높이
toolbar: [
['style', ['style']],
['font', ['bold', 'italic', 'underline']],
['color', ['color']],
['para', ['paragraph']],
['table', ['table']],
['insert', ['link']],
]
});
});
</script>
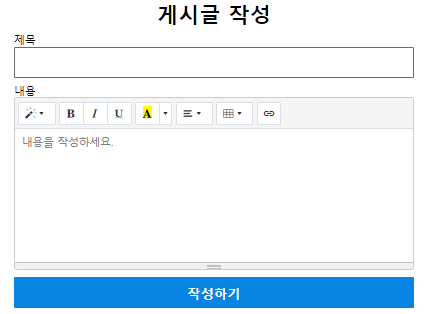
52.text-editor.html 최종
<!DOCTYPE html>
<html lang="ko">
<head>
<meta charset="UTF-8">
<meta name="viewport" content="width=device-width, initial-scale=1.0">
<title>Rich Text Editor</title>
<!-- css 파일을 불러오는 코드 -->
<!-- 아이콘 사용을 위한 Font Awesome 6 CDN -->
<link rel="stylesheet" type="text/css"
<!-- 구글 웹 폰트 사용을 위한 CDN -->
<!-- 내가 만든 CSS 파일-->
<link rel="stylesheet" type="text/css" href="./css/reset.css">
<link rel="stylesheet" type="text/css" href="./css/commons.css">
<!-- <link rel="stylesheet" type="text/css" href="./css/test.css"> -->
<style>
.note-frame {
/* line-height: 1.2em; em을 설정할 때는 fontsize를 설정해야함 */
line-height: 2 !important; /* 고유한 크기의 2배 */
}
</style>
<!-- jquery cdn -->
<!-- summernote cdn -->
<link href="https://cdn.jsdelivr.net/npm/summernote@0.8.18/dist/summernote-lite.min.css" rel="stylesheet">
<!-- javascript 작성 공간 -->
<script>
$(function () {
$('[name=boardContent]').summernote({
placeholder: '내용을 작성하세요.',
tabsize: 2, //탭을 누르면 이동할 간격
height: 120, //에디터 높이
minHeight: 200, //에디터 최소 높이
toolbar: [
['style', ['style']],
['font', ['bold', 'italic', 'underline']],
['color', ['color']],
['para', ['paragraph']],
['table', ['table']],
['insert', ['link']],
]
});
});
</script>
</head>
<body>
<form method="post">
<div class="container w-600">
<div class="row">
<h1>게시글 작성</h1>
</div>
<div class="row left">
<label>제목</label>
<input type="text" name="boardTitle" class="form-input w-100">
</div>
<div class="row left">
<label>내용</label>
<textarea name="boardContent"></textarea>
</div>
<div class="row">
<button type="submit" class="btn btn-positive w-100">작성하기</button>
</div>
</div>
</form>
</body>
</html>
form을 이용해서 데이터를 전송하는 경우에는 데이터가 key-value 세트를 이루어 전송된다.
주소?name=value&name=value&...
하나의 이름에 데이터를 하나만 연결하여 보낼 수 있다.
이러한 방식을 Form URL Encoding 방식이라고 부른다.
파일을 보내야 할 정보가 한 개가 아니므로 이러한 방식에선 이름만 전송된다.
따라서, 파일을 전송하고 싶다면 전송방식의 변경이 필요하다.
여기에 적잡한 방식을 Multipart 방식이라고 부른다.
form에 다음 정보를 추가한다.
method = "post" enctype= "multipart/form-data"
1. 전송 방식을 post로
2. 인코딩 타입을 multipart로
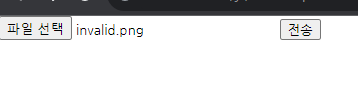
53.file-upload.html
<!DOCTYPE html>
<html lang="ko">
<head>
<meta charset="UTF-8">
<meta name="viewport" content="width=device-width, initial-scale=1.0">
<title>파일 업로드</title>
<!-- 구글 웹 폰트를 사용을 위한 CDN -->
<!-- 아이콘 사용을 위한 Font Awesome 6 CDN -->
<link rel="stylesheet" type="text/css" href="https://cdnjs.cloudflare.com/ajax/libs/font-awesome/6.4.2/css/all.min.css">
<!-- 내가 만든 CSS 파일을 불러오는 코드 -->
<link rel="stylesheet" type="text/css" href="./css/reset.css">
<link rel="stylesheet" type="text/css" href="./css/commons.css">
<link rel="stylesheet" type="text/css" href="./css/test.css">
<style>
</style>
<!-- jquery cdn -->
<!-- Javascript 작성 공간 -->
<script>
</script>
</head>
<body>
<!--
form을 이용해서 데이터를 전송하는 경우에는
데이터가 key=value 세트를 이루어 전송된다
주소?name=value&name=value&..
하나의 이름에 데이터를 하나만 연결하여 보낼 수 있다
이러한 방식을 Form URL Encoding 방식이라고 부른다
파일은 보내야 할 정보가 한 개가 아니므로 이 방식에선 이름만 전송된다
따라서, 파일을 전송하고 싶다면 전송방식의 변경이 필요하다.
여기에 적합한 방식을 Multipart방식이라고 부른다
form에 다음 정보를 추가한다
method="post" enctype="multipart/form-data"
-->
<form action="http://localhost:8080/file/upload"
method="post" enctype="multipart/form-data">
<input type="file" name="attach">
<button>전송</button>
</form>
</body>
</html>
'jQuery' 카테고리의 다른 글
| jquery05 - 캔버스 태그, group by (0) | 2023.09.12 |
|---|---|
| jquery04 - ajax2 (0) | 2023.09.11 |
| jQuery03 - ajax (0) | 2023.09.08 |
| jQuery02 - checkbox, 화면분할 (0) | 2023.09.07 |
| jQuery01 - input, form, 정규표현식, 회원가입페이지 (0) | 2023.09.06 |
'jQuery' Related Articles
more


